In this tutorial, you will learn how to stop a running Arduino program and why you need the Arduino reset. If you are just starting with Arduino programming, also have a look at our tutorial on How Easy Is It To Learn Arduino.
Hardware components
| Arduino Uno Rev3 | x1 | Amazon |
| Arduino Mega (Optional) | x1 | Amazon |
| LED | x1 | Amazon |
| 220Ω Resistor | x1 | Amazon |
| USB cable type A/B | x1 | Amazon |
Software
| Arduino IDE | Arduino IDE |
Makerguides.com is a participant in the Amazon Services LLC Associates Program, an affiliate advertising program designed to provide a means for sites to earn advertising fees by advertising and linking to products on Amazon.com. As an Amazon Associate we earn from qualifying purchases.
Why Would You Need To Stop An Arduino Program?
The purpose of stopping an Arduino Program could be to stop an Arduino program from building new projects, stop annoying loops, or fix an error in your code.
In my experience, I find that loops can run forever because the programmer forgot to include an exit condition, or their code has an error that prevents the loop from ending.
As a result, it may be hard to escape the loop if you don’t stop the program as a whole.
How do I stop my Arduino from running?
An Arduino program can be stopped using either hardware or software:
1. Using Hardware
Stopping a program using hardware is perhaps the simplest and quickest option, and you have 2 main options:
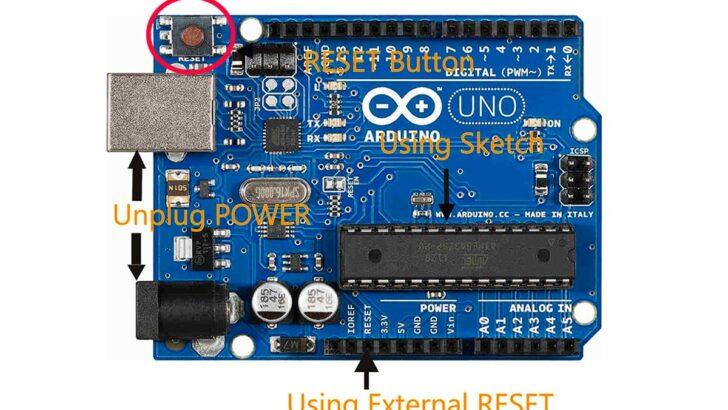
1) How do I start and stop Arduino safely?
Arduino Uno can safely unplug from the power supply at any time. When you plug or reconnect the power, the Hardware will start as it is, without any data loss.
So, you can start and stop your Arduino board without any hesitation.
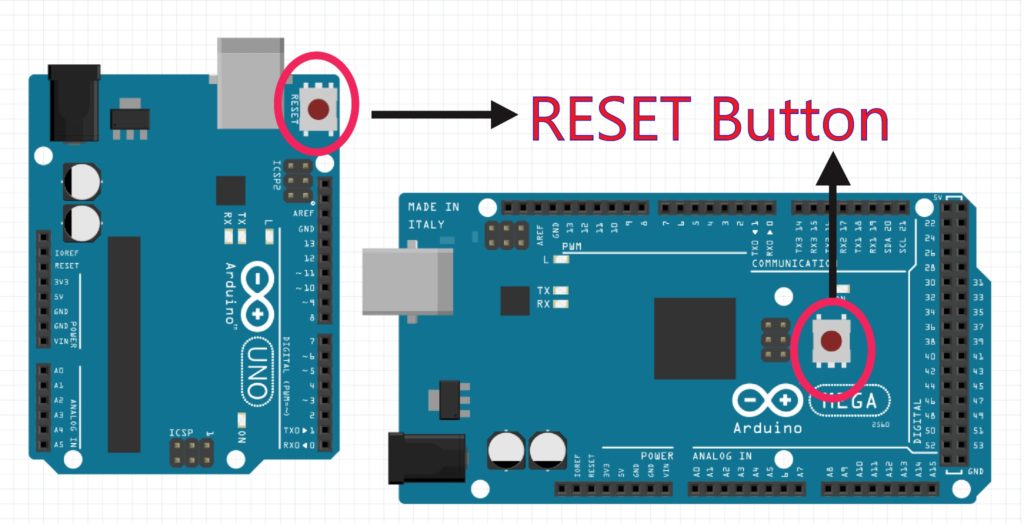
2) Reset the Arduino via the button
The Arduino program will stop when you press the RESET button. After resetting the Arduino board, all variables can define and initialize the peripherals, and the rest of the code runs as it is.
With hardware methods, you can stop the Arduino program manually, and it will again start executing the main program after powering up.
So, if there is any unnecessary infinite loop in your code, then again, the program will be stuck in that infinite loop, and hardware methods are not suitable for such a problem.
2. Using Software
To overcome the limitation of hardware methods, you can also stop a program running in Arduino using software, which you may need to do if your program is stuck in a loop.
What’s The Purpose Of An Arduino Loop In The First Place?
An Arduino loop performs very repetitive tasks for you quickly, which is very helpful. This loop can save your time and effort.
The Arduino IDE uses the default loop, which is the void loop. It is necessary to include it in the code.
Arduino Code with loop for repetitive task
int counter=10;

void setup(){
  Serial.begin(9600);
  Serial.println("Start the counter");
}

void loop() {
  Serial.print("Counter: ");
  Serial.println(counter);
  counter++;
  delay(1000);
}
How The Code Works
Step 1:
int counter=10;
Firstly, I declare and initialize the counter.
Step 2:
void setup() {
   Serial.begin(9600);
   Serial.println("Start the counter");
 }
In the setup() function, Initialize the serial terminal to a 9600 baud rate.
Step 3:
void loop() {
  Serial.print("Counter: ");
  Serial.println(counter);
  counter++;
  delay(1000);
}
In the void loop() function, the counter increments one by one and updates after one second.
Also, print a message on the serial terminal.
Output On The Serial Terminal
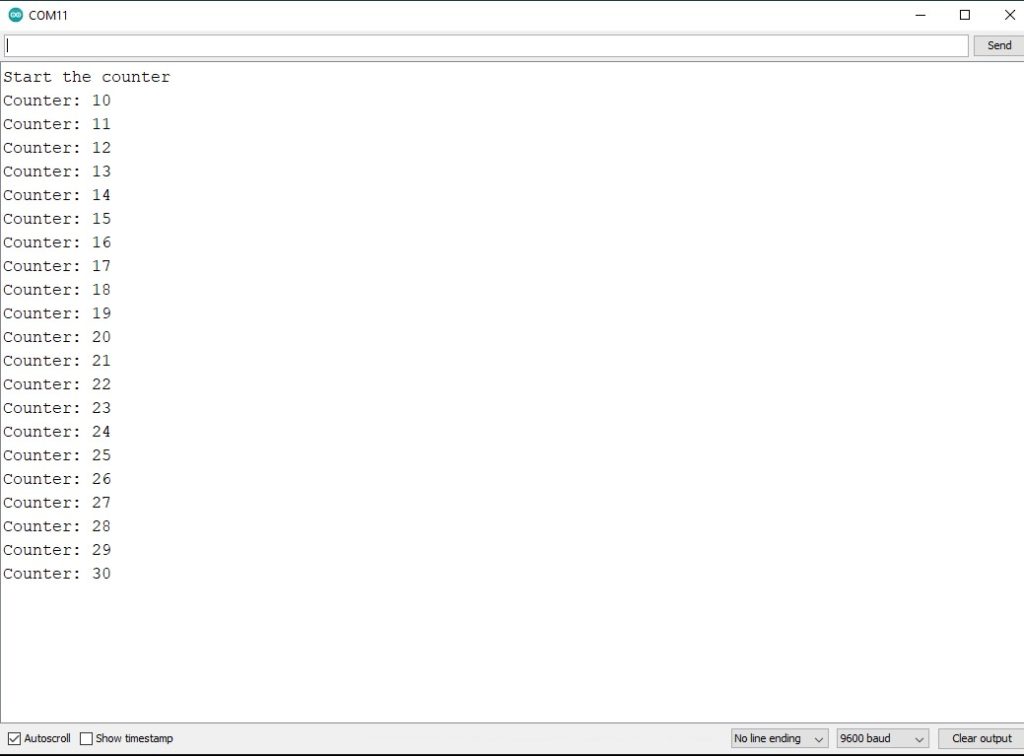
This counter value is constantly updated. But, in some cases, less value is required; it is impossible to control this loop in this situation.
How Do You Stop A Loop In Arduino?
1. Is there a stop function in the Arduino?
Arduino IDE has an exit(); function to stop the loops.
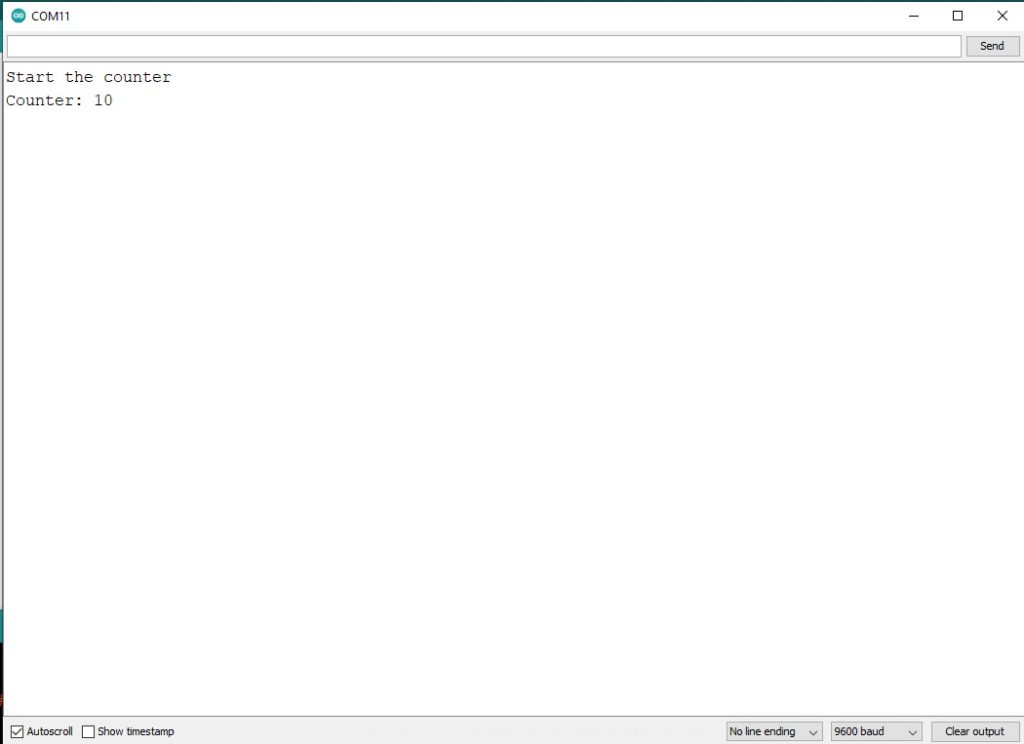
Arduino Code with exit() function to stop the loops
int counter=10;

void setup(){
  Serial.begin(9600);
  Serial.println("Start the counter");
}

void loop() {
  Serial.print("Counter: ");
  Serial.println(counter);
  counter++;
  delay(1000);
  exit(0);
}
How The exit() Function Code Works
Here, in the above code, I have used the exit() function to get out of the loop.
Output On The Serial Terminal
2. Stop the void loop() Using the Infinite Loop
There are three different ways to use an infinite loop in your void() function:
1. Using for ( ; ; ) { /* empty */ }
2. Using while (1) { /* empty */ }
3. Using while(true) { /* empty */ }
Arduino Code to stop the loop with infinite for or while loop
int counter=10;

void setup(){
  Serial.begin(9600);
  Serial.println("Start the counter");
}

void loop() {
  Serial.print("Counter: ");
  Serial.println(counter);
  counter++;
  delay(1000);

  for(; 😉 {
    /*Empty*/
  }
}
How The Infinite For or While Loop Code Works
Step 1:
int counter=10;
Firstly, declare the variable and initialize it with 10.
Step 2:
void setup() {
  Serial.begin(9600);
   Serial.println("Start the counter");
 }
In the setup() function, Initialize the serial terminal.
void loop() {
  Serial.print("Counter: ");
  Serial.println(counter);
  counter++;
  delay(1000);

  for(; 😉 {
    /*Empty*/
  }
}
In the void loop() function, start the counter. And print a message on the serial terminal.
After for ( ; ; ) { /* empty */ } using break the loop.
Same as for loop, you can use while (1) { /* empty */ } and while (true) { /* empty */ } loop.
Use the while (1) { /* empty */ } and while (true) { /* empty */ } loop instead of the
for ( ; ; ) { /* empty */ } loop inside the above code.
Output for ( ; ; ) loop

Output while (1) loop

Output while (true) loop

You can see the output and observe; by including one of these, you are effectively giving the illusion that the Arduino is not running.
3. Stop the void loop() Using Both the If Statement and Boolean.
You can control your loops using a boolean and an if statement. A boolean holds only two values: true and false.
Arduino Code to stop the loop with the if statement
boolean Counter_Check = true;
int counter = 10;

void setup() {
  Serial.begin(9600);
  Serial.println("Start the counter");
}

void loop() {
  if (Counter_Check == true) {
    Serial.print("Counter: ");
    Serial.println(counter);
    counter++;
    delay(1000);
  }

  Counter_Check = false;
}
How The if Statement Code Works
Step 1:
boolean Counter_Check = true;
int counter = 10;
First, I defined the variable boolean Counter_Check and declared the counter variable.
void setup() {
  Serial.begin(9600);
  Serial.println("Start the counter");
}
In the setup() function, Initialize the serial terminal.
Step 3:
void loop() {
  if (Counter_Check == true) {
    Serial.print("Counter: ");
    Serial.println(counter);
    counter++;
    delay(1000);
  }

  Counter_Check = false;
}
In the void loop(), check the condition that if the Counter_Check value is true, then the counter value is printed on the serial terminal.
After the condition, I make the Counter_Check value false. So, stop the void loop.
Output On The Serial Terminal

4. Stop Arduino Module Using Sleep Mode
Sleep mode can be used for a controlled pause or a complete task lock.
The method to wake up the Arduino can be chosen before putting it in sleep mode; typically, an Arduino is configured to wake up by a timer or an external interrupt.
You can learn more about the sleep mode from ATmega328 datasheet and refer to topic no. 14.
Installing the required Arduino libraries
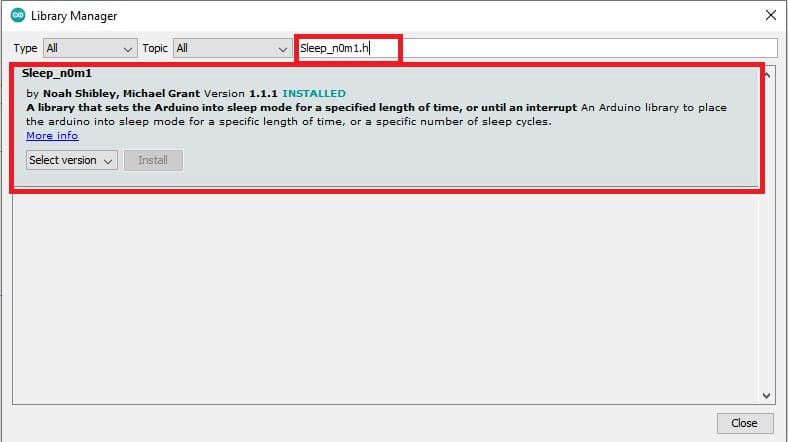
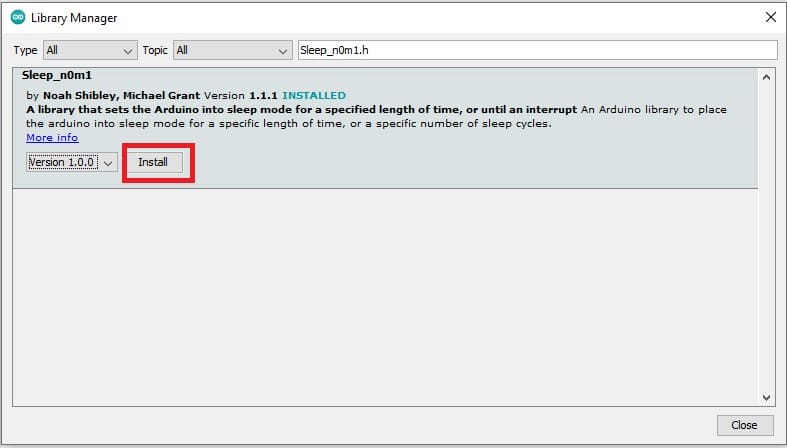
Using sleep mode with Arduino IDE, you can use an already built library, Sleep_n0m1. Follow the below-mentioned steps to install the library.
Step 1: Go to the Tools > Manage Libraries to open the library manager in Arduino IDE.

Step 2: Now, in the search box, type “Sleep_n0m1.h”. Install a library and use it.
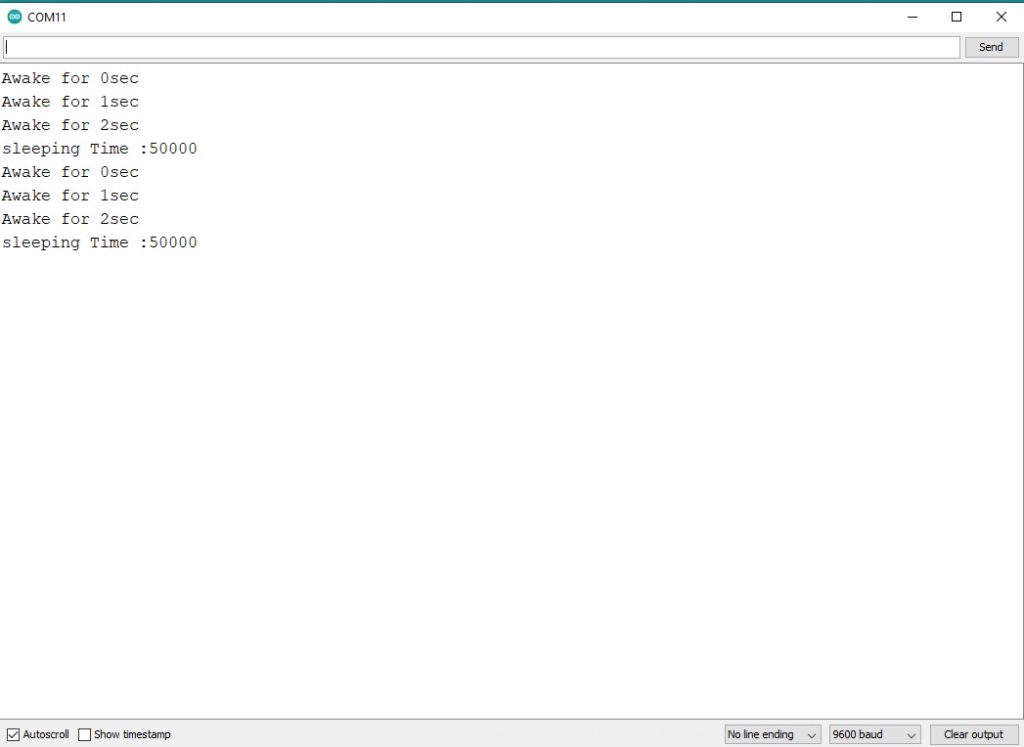
Arduino Code for sleep mode
#include "Sleep_n0m1.h"

int counter = 0;
Sleep sleep;
unsigned long Rest_Time; 		// how long you want the arduino to sleep

void setup()
{
   Serial.begin(9600);
   Rest_Time = 50000; 		// set sleep time in ms
}

void loop()
{
  delay(100); 			// delay to allow serial output to be ready after waking up
  Serial.print("Awake for ");
  Serial.print(counter);
  Serial.println("sec");

  counter++;
  delay(1000);                           // waits for a second

  if(counter >= 3)
  {
    Serial.print("sleeping Time :");
    Serial.println(Rest_Time);
    delay(100); 	//delay to allow serial to fully print before sleep
    counter = 0;
    sleep.pwrDownMode(); 		// set sleep mode
    sleep.sleepDelay(Rest_Time); 	// sleepTime
  }
}
How The Sleep Mode Code Works
Step 1: First, I have included the necessary header files Sleep_n0m1.h.
#include "Sleep_n0m1.h"
Step 2: Initialize the counter variable and Rest_Time variable.
int counter = 0;
Sleep sleep;
unsigned long Rest_Time;
Step 3:
void setup()
{
  Serial.begin(9600);
  Rest_Time = 50000; 		//set sleep time in ms
}
In the setup() function, Initialize the serial terminal. Set the sleep time in milliseconds.
Step 4:
void loop()
{
  delay(100); 			       // delay to allow serial output to be ready after waking up
  Serial.print("Awake for ");
  Serial.print(counter);
  Serial.println("sec");

  counter++;
  delay(1000);                            // waits for a second
In the void loop() function, start the count for a second, increment the counter, and wait for 1 second.
Step 5:
if (counter >= 3)
  {
    Serial.print("sleeping Time :");
    Serial.println(Rest_Time);
    delay(100);	 			//delay to allow serial to fully print before sleep
    counter = 0;
    sleep.pwrDownMode(); 			//set sleep mode
    sleep.sleepDelay(Rest_Time); 		//sleep for: sleepTime
  }
}
I have used this condition if the counter counts the second. It counts for up to 3 seconds. After the counter, I make 0.
Using sleep.pwrDownMode() and sleep.sleepDelay(sleepTime) function, The CPU goes to sleep mode for 50,000 ms.
Output On The Serial Terminal
5. Using External Reset To Restart the Arduino Board
The Arduino turns to reset itself using an External reset.
Wiring Diagram for external Reset
Step 1: Connect the LEDs cathode (-) to a GND pin of the Arduino.
Step 2: Plug the Anode (+) of the LED to 220 Ohm resistor to digital pin 10 of the Arduino.
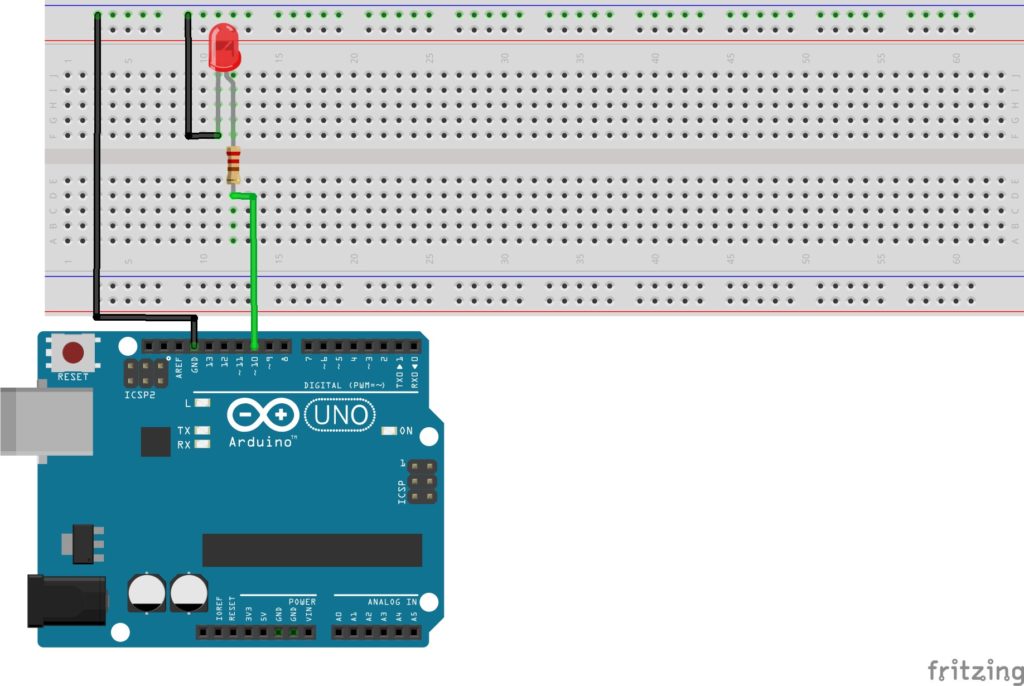
Step 3: Connect the Arduino pin 4 to the Reset pin.
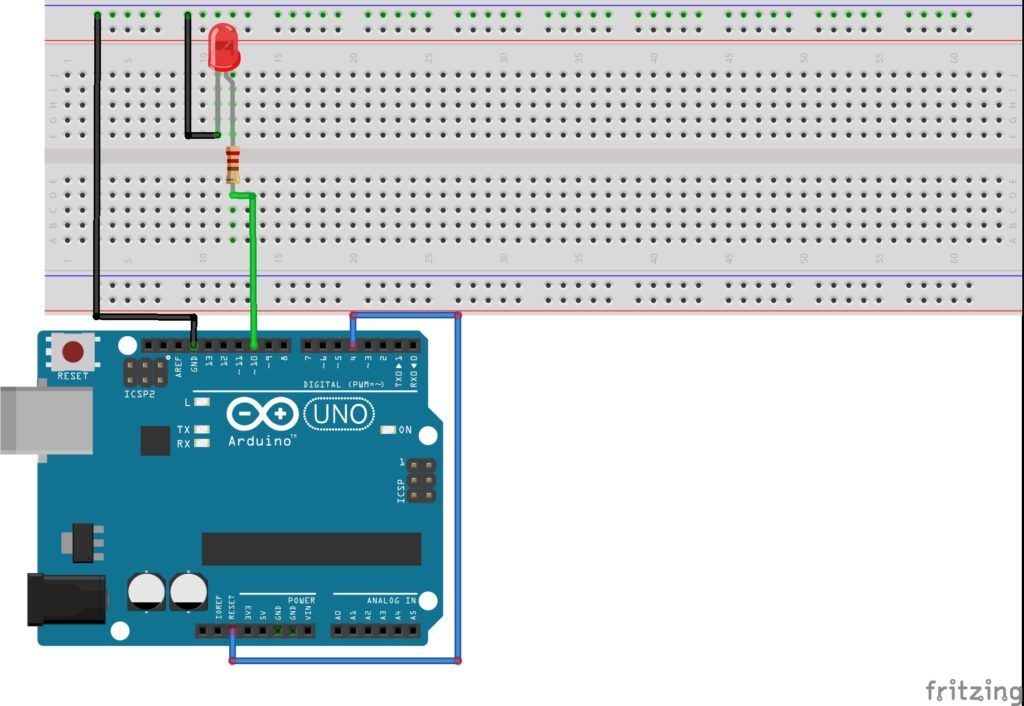
Now, Ready to use this wiring diagram.
Arduino Code for external Reset
#define Blink_LED 10
#define RESET_PIN 4
void setup() {
digitalWrite(RESET_PIN, HIGH);
delay(200);
pinMode(Blink_LED, OUTPUT);
pinMode(RESET_PIN, OUTPUT);
Serial.begin(9600);
delay(200);
}
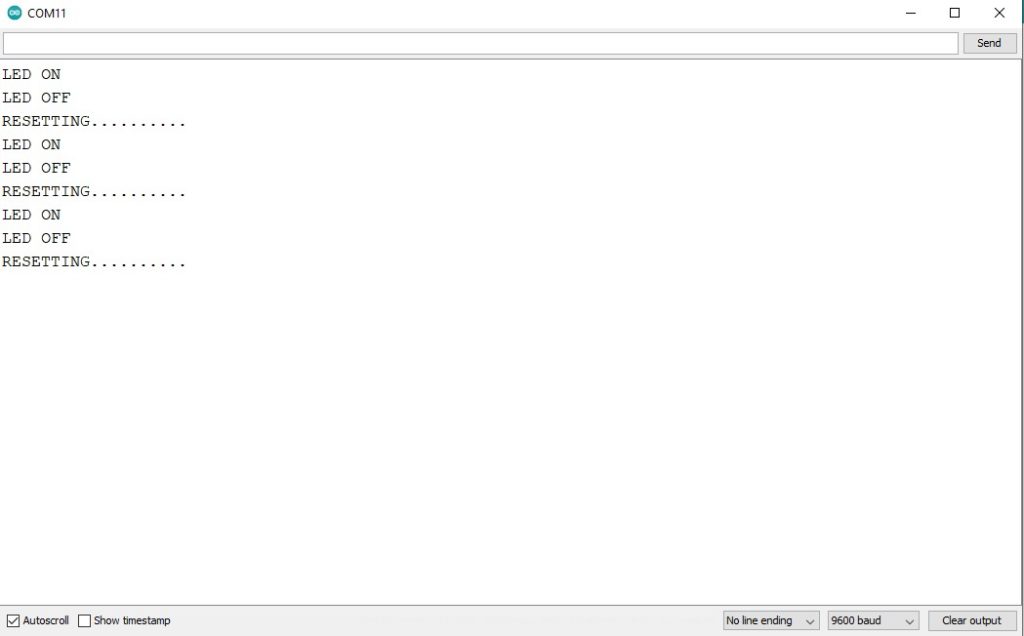
void loop() {
delay(10);
digitalWrite(Blink_LED, HIGH); // turn the LED on
Serial.println("LED ON");
delay(1000); // wait for a second
digitalWrite(Blink_LED, LOW); // turn the LED off
Serial.println("LED OFF");
delay(1000);
Serial.println("RESETTING..........");
delay(50); // necessary to use delay 50 second
digitalWrite(RESET_PIN, LOW);
Serial.println("Arduino will never reach there");
}
How The External Reset Code Works
Step 1: I defined the LED Arduino Pin 10. and Reset the pin to Arduino pin 4.
#define Blink_LED       10
#define RESET_PIN     4
Step 2:
void setup() {
  digitalWrite(RESET_PIN, HIGH);
  delay(200);
  pinMode(Blink_LED, OUTPUT);
  pinMode(RESET_PIN, OUTPUT);
  Serial.begin(9600);
  delay(200);
}
In the setup() function, Using pinMode(); function, LED and reset pin set as OUTPUT mode. Initialize the serial terminal.
Step 3:
void loop() {
  delay(10);
  digitalWrite(Blink_LED, HIGH);   // turn the LED on
  Serial.println("LED ON");
  delay(1000);               // wait for a second
  digitalWrite(Blink_LED, LOW);    // turn the LED off
  Serial.println("LED OFF");
  delay(1000);               // wait for a second
  Serial.println("RESETTING..........");
  delay(50);   		//  necessary to use delay 50 second
  digitalWrite(RESET_PIN, LOW);
  Serial.println("Arduino will never reach there");
}
In the void loop(), toggle the LED and, after 1 second, reset the Arduino. After resetting the Arduino, the next line will not execute. Because of Before this line, Arduino goes to reset.
Output On The Serial Terminal
6. Stop The Arduino Using Watchdog Timer Method
The ATmega328P has a Watchdog Timer (WDT).
This feature is useful to help the system recover from a situation where the system hangs due to errors in the code written or due to conditions that may arise due to hardware issues.
The WDT needs to be configured according to your application.
Arduino Code to stop loop using the watchdog timer
#include "avr/wdt.h"
int counter=10;
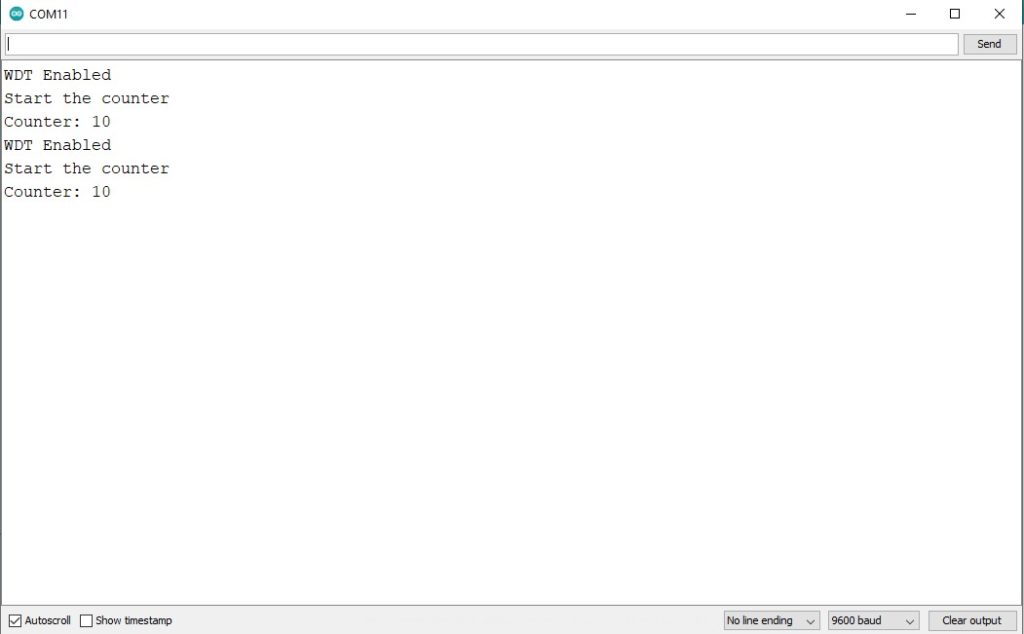
void setup() {
Serial.begin(9600);
wdt_disable(); // Disable WDT
delay(3000);
wdt_enable(WDTO_1S); // Enable WDT with a timeout of 1 second
Serial.println("Watchdog Timer Enabled");
Serial.println("Start the counter");
}
void loop() {
Serial.print("Counter: ");
Serial.println(counter);
counter++;
delay(1000);
wdt_reset(); // Reset the watchdog
while(1); // Watchdog timer get triggered
}
How The Watchdog Timer Code Works
Step 1: I am using the AVR WDT library. Initialize the variable counter.
#include "avr/wdt.h"
int counter=10;
Step 2:
void setup() {
   Serial.begin(9600);
   wdt_disable(); // Disable WDT
   delay(3000);
   wdt_enable(WDTO_1S); 		//Enable WDT with a timeout of 1 second
   Serial.println("WDT Enabled");
   Serial.println("Start the counter");
}
Initialize serial terminal and first disable WDT. I used a delay of 3 seconds. The program won’t reset here because the watchdog is disabled.
Step 3: Now, the WDT with a timeout of 1 second is enabled. If the program doesn’t reset this timer within every 1 second, then the watchdog will get triggered and restart the Arduino.
Step 4:
void loop() {
  Serial.print("Counter: ");
  Serial.println(counter);
  counter++;

  delay(1000);
  wdt_reset(); 		// Reset the watchdog

  while(1); 		// Watchdog timer get triggered
}
Counter values are sent to the serial monitor and reset to the watchdog every second in the loop.
Then, the program enters into an infinite while loop.
Over here, since there is no WDT, it will get triggered and restart the Arduino.
Output On The Serial Terminal
Conclusion
In this tutorial, I have discussed why you may need to stop an Arduino program and provided multiple ways that you can do this using either hardware or software.
Arduino IDE has an in-built function library to stop Arduino programs, and I have shared with you multiple bits of code you can utilize depending on your aims.
I hope you found this article informative, and I would love to know what project you plan on building or have already made with the Arduino.
If you have any queries or suggestions or think things are missing in this tutorial, please comment below.
Note that comments are held for moderation to prevent spam.

Hiren is a professional Embedded Engineer with a Master’s Degree
in Electronics and Communication Engineering. He is proficient in C and
C++ and enjoys building DIY projects on Arduino, ESP32, PIC32, STM32 & Raspberry PI boards.