Lighting devices for Arduino and other microcontrollers (MCUs) offer a broad range of possibilities for both beginner and advanced developers. Devices like LEDs, LED strips, and even laser diodes can be easily controlled using Arduino boards. Whether you’re building a simple indicator light or a complex, interactive light installation, Arduino makes it remarkably straightforward to bring your project to life. In this blog post, we provide a comprehensive overview of the most common lighting devices used in Arduino projects.
Makerguides.com is a participant in the Amazon Services LLC Associates Program, an affiliate advertising program designed to provide a means for sites to earn advertising fees by advertising and linking to products on Amazon.com. As an Amazon Associate we earn from qualifying purchases.
Lighting devices
LEDs
LEDs, or Light Emitting Diodes, are compact semiconductor devices renowned for their efficiency and longevity. When an electric current is applied, they emit light in a process called electroluminescence. This process is characterized by minimal heat production, making LEDs a cool and energy-saving alternative to traditional light sources. Available in a spectrum of colors, sizes, and intensities, LEDs are incredibly versatile. They are commonly used for a wide range of applications, from basic indicator lights on electronic devices to expansive architectural lighting displays and even in medical devices for therapeutic purposes.
Below an example of some LEDs in different colors. You can buy them very cheaply in assorted kits:
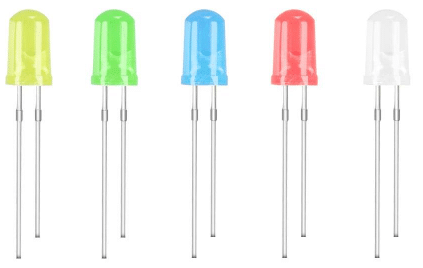
3mm and 5mm Diffused LED Light Emitting Diode Assortment Kit – Pack of Assorted Color Diffused LEDs (310pcs) and Resistors
We have multiple tutorials on different LED types and how to control them. If you are beginner start with the simple blinking LED project.
Key considerations
When using LEDs, it’s crucial to remember they are polarized, meaning they have a positive and negative side. Connecting them in reverse can prevent them from working or possibly damage them. Moreover, always use an appropriate current-limiting resistor when interfacing with an Arduino or similar platforms. Overloading the LED can lead to premature failure or reduced lifespan.
RGB LEDs
RGB LEDs integrate red, green, and blue light-emitting diodes within a single unit. This allows for the creation of a broad palette of colors by varying the intensity of each individual color. Beyond the basic spectrum, RGB LEDs can be dimmed or brightened to produce shades ranging from pastels to intense hues. These versatile LEDs are widely used in projects that aim for dynamic mood lighting, color-changing effects, artistic installations, and even in stage lighting due to their ability to create diverse visual atmospheres.
Below you can see the picture of a 4-pin RGB LED. Also have a look at our tutorial on how to control an RGB LED from an Arduino.
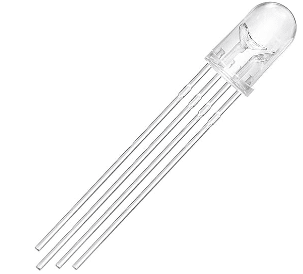
Chanzon 5mm RGB Multicolor LED Diode Lights Common Anode 3 Color 4 pin
Key considerations
Note that RGB LEDs require more control pins than mono-color LEDs, typically 3 or 4. Make sure that each color channel has a suitable current-limiting resistor. Providing improper power can lead to inconsistent color output or even damage.
IR LEDs
IR LEDs (Infrared Light Emitting Diodes) specialize in emitting light in the infrared spectrum, which remains invisible to the naked eye. However, many modern electronic sensors and cameras can detect this light, making it valuable for various applications. From television remote controls to motion-sensing alarms and infrared night vision systems, IR LEDs play a crucial role in modern electronics, providing communication and sensing capabilities.
The picture below shows an IR LED and the corresponding IR Sensor:
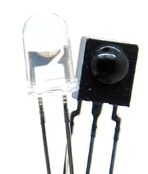
Gikfun 5mm 940nm LEDs Infrared Emitter IR Emission and IR Receiver Diode
We have a tutorial on how to use an IR receiver and remote with an Arduino.
Key considerations
Since IR light is invisible, testing its functionality often requires the aid of cameras or specific IR sensors. Moreover, the material’s interactions with IR light—whether absorption or reflection—may differ from visible light, impacting sensor readings.
Laser LEDs
Laser LEDs stand out due to their coherent and focused light emission. Unlike standard LEDs, which disperse light in multiple directions, laser LEDs concentrate light, producing a narrow and intense beam. This characteristic is invaluable in precision applications. From rangefinders that measure distances accurately to high-speed optical communication systems, barcode readers or simple laser pointers.
The following picture shows a simple module with a Laser emitting diode that can be directly connected to an Arduino.
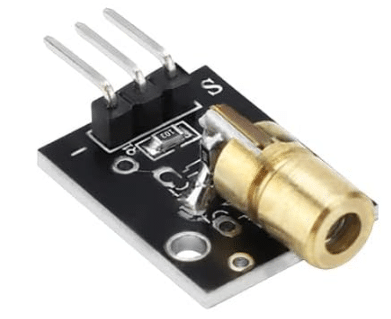
3 Pin 650nm 5V Laser Transmitter Module Board KY-008 Dot Diode Copper Head Sensor Module
Key considerations
Direct exposure to laser LEDs can be hazardous, especially if it comes in contact with eyes. You should wear protective eyewear and ensure controlled power levels.
LED Strips
LED strips, as their name suggests, are long, flexible circuits dotted with numerous LEDs. Available in various colors, intensities, and configurations, these lighting devices can be trimmed to fit specific lengths. They’re a favorite for interior designers and hobbyists, since they offer customizable ambient lighting, intricate decorative setups, and even dynamic light displays synchronized with music or other triggers.
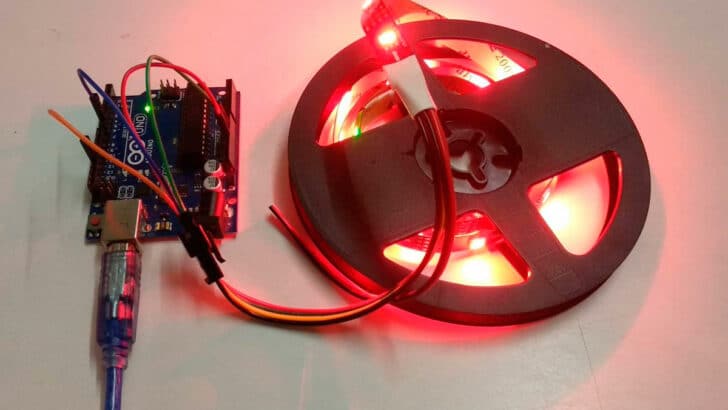
Below you can see the section of an LED strip. For more details see our tutorial on how to control an LED strip with an Arduino.
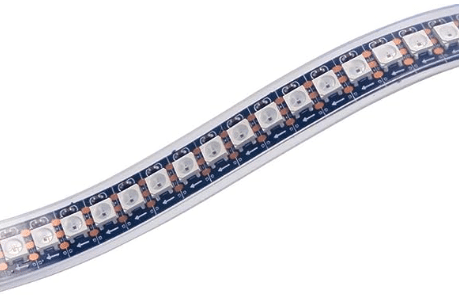
BTF-LIGHTING WS2812B ECO LED Strip, Chasing Effects 5050SMD Individually Addressable 3.3FT 144(2X72) Pixels/m Flexible Black FPCB Dream Color IP30
Key considerations
Powering LED strips, especially longer ones, demands a robust power supply that can handle the cumulative current requirement. For longer strips you also may need to inject power at periodic intervals to prevent dimming at the far end.
LED Rings
LED rings offer a unique visual appeal with their circular arrangement of LEDs. Especially popular with addressable LEDs, these lighting devices can create captivating patterns, color transitions, and visual effects. They’re commonly found in innovative clock designs, compass displays, artistic installations, and as accents in smart devices to show status or notifications.
The picture below shows an LED ring, which uses the same LED type (WS2812B) as the LED strip above. You can therefore follow the same tutorial on how to control an LED strip with an Arduino.
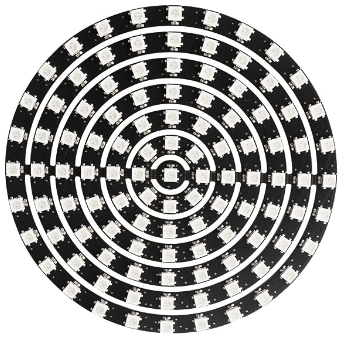
Treedix WS2812B 5050 RGB LED Ring Light 109 LEDs 7 Rings Matrix Individually Addressable Full Dream Color DC 5V
Key considerations
LED rings, especially when addressable, follow specific communication protocols. You will need to implement the protocol or preferably use a suitable library. Also note that the memory consumption might be high when implementing complex patterns.
UV LEDs
UV (ultraviolet) lights, while not visible to the human eye, play an important role in various scientific, health, and artistic applications. Emitting radiation in the ultraviolet spectrum, these lights are commonly utilized for purposes like sterilization, fluorescence detection, and even in creative UV art. In Arduino projects, UV LEDs can be incorporated for tasks like building UV exposure boxes, counterfeit currency detectors, or even DIY UV curing stations.
UV LEDs look just like regular clear LEDs (see below) and can be controlled like any other LED.
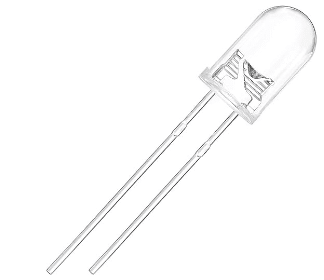
CHANZON 5mm Purple UV LED Diode Lights (Violet Clear Round Transparent DC 3V 20mA)
Key considerations
UV LEDs typically operate at low currents, similar to regular LEDs, making them relatively straightforward to interface with an Arduino. However, when working with UV lights, safety is important, since prolonged exposure can harm eyes and skin. Also, always ensure that the UV LED’s voltage requirement matches the Arduino or any external power supply to avoid potential damage.
Note that there are UV panels that are composed of many UV LEDs (see picture below). These typically run on mains voltage (110V or 220V) and cannot directly connected to an Arduino! You will need a relay for that.
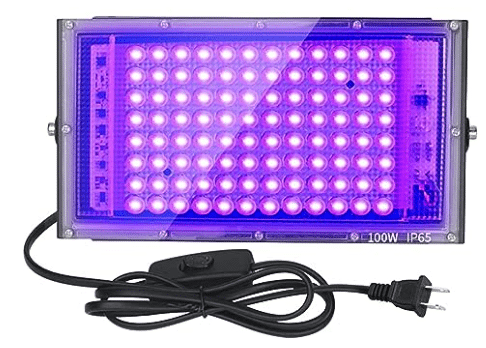
Indmird 100W UV Black Light, Black Light Party, Stage Lighting, Halloween, Body Paint, Fluorescent Poster, Neon Glow
EL Wire
EL Wire, or Electroluminescent Wire, is a thin, flexible wire that emits a uniform light across its length when an alternating current is applied. It’s popular for wearable tech, decorative installations, and situations where a flexible and cool light source is required, such as in costumes or vehicle interiors.
Below you see an EL wire kit with wires of different colors and a battery back with an integrated driver.
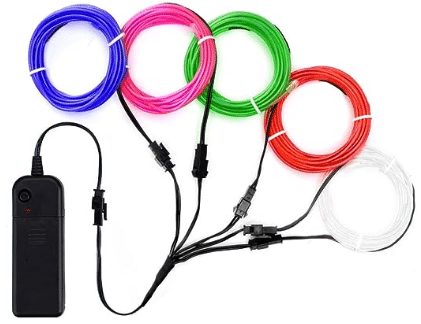
MaxLax EL Wire Portable Set, 9ft Cuttable Battery Pack Neon Glowing Electroluminescent Wire Light kit(Green, Blue, Red, White, Pink)
Key considerations
EL Wires require special drivers or inverters to provide the alternating current necessary for it to light up. For long wires you need sufficient power to avoid a reduction in brightness towards the end of the wire.
Incandescent Bulbs
Incandescent bulbs are lighting devices that produce light by heating a tungsten filament until it radiates a warm glow. While less energy-efficient than modern LEDs, they are loved for their nostalgic warmth and soft lighting. They’re often used in settings where ambiance is prioritized over efficiency, such as in themed restaurants, retro setups, or even in homes that desire a vintage aesthetic.
Below is a picture of a retro light bulb. You cannot directly control these lights from an Arduino but must use a relay!
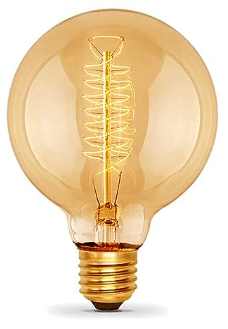
G25(G80) Globe Bulb Edison Light Bulbs, 60W Retro Incandescent Bulb, E26 Medium Base, 240 Lumens 2100K Warm White, Dimmable
Key considerations
Incandescent bulbs operate at much higher voltages than LEDs. This is potentially dangerous! Do not connect your Arduino to high voltages! Ensure electrical isolation of the Arduino and the power for the light bulb be using a relay. Also make sure that you are using the correct voltage for the light bulb (110V vs 220V).
Summary
In this article, we provided an overview of various lighting devices that are commonly used in Arduino projects. We specifically looked at LEDs, a widely popular choice due to their energy efficiency and versatility. Delving deeper, we explored RGB LEDs which offer a mix of red, green, and blue lights, allowing a multitude of color outputs based on intensity control. Infrared LEDs, another variant, emit an invisible light spectrum, making them invaluable for specialized uses like remote controls. We also covered Laser LEDs, a type that stands out for its highly directional and focused light, suitable for tasks like distance measurements.
We showed more flexible lighting devices such as LED strips and rings. Strips, which are adaptable circuits populated with multiple LEDs, can be customized in length, and the rings, often used with addressable LEDs, are renowned for their circular arrangements and individual LED control. Lastly, we touched upon the enduring appeal of incandescent bulbs. While they may be overshadowed by newer technologies in terms of efficiency, they are still sought after for applications needing a warm, vintage glow.
Stefan is a professional software developer and researcher. He has worked in robotics, bioinformatics, image/audio processing and education at Siemens, IBM and Google. He specializes in AI and machine learning and has a keen interest in DIY projects involving Arduino and 3D printing.