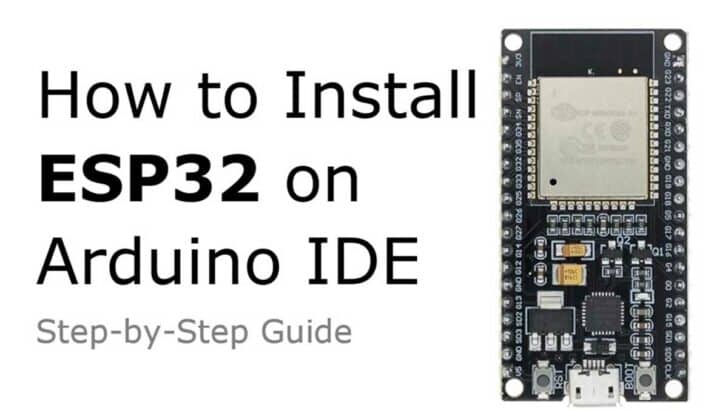
In this tutorial you will learn how you can program an ESP32 using the Arduino IDE by installing the ESP32 Core within the Arduino environment.
The Arduino IDE (Integrated Development Environment) is a software application used to write, compile, and upload code to Arduino boards. It provides a user-friendly interface for programming Arduino projects and includes features such as code highlighting, auto-completion, and a serial monitor for debugging.
It is natively focused on Arduino boards and you cannot use it immediately to program other popular microprocessors such as the ESP32 or the ESP8266. However, the ESP32 is more powerful and natively has WiFi support, which makes it a preferred choice for many applications. See our post: ESP32 vs Arduino Speed Comparison. If you are new to the ESP32 then also have a look at our Beginners Guide to ESP32.
The ESP32 comes with its own Integrated Development Environment the esp-idf, which is great but much harder to use than the Arduino IDE, especially for small projects or if you are a beginner. You can, however, get the best of both worlds by installing the ESP32 core libraries within the Arduino IDE environment. With that you can program the powerful ESP32 using the simple Arduino IDE.
In this tutorial, we will guide you through the process of installing the ESP32 Arduino Core and provide three programming examples for the ESP32 using the Arduino IDE. Whether you are a beginner or have some experience with Arduino, this step-by-step guide will help you get started with the ESP32 and unleash its full potential.
Before we dive into the installation process and programming examples, let’s take a quick look at the parts you will need to follow along with this tutorial.
Required Parts
Below you will find the components required. For this tutorial, I am using an older ESP32 board, which has been deprecated but you can still get it for a very low price. That’s the one listed below. There is a successor model with improved specs, which you can find here. But pretty much any other ESP32 based board will be fine as well.
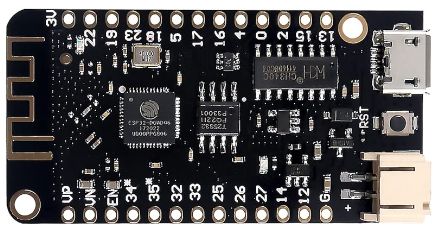
ESP32 lite
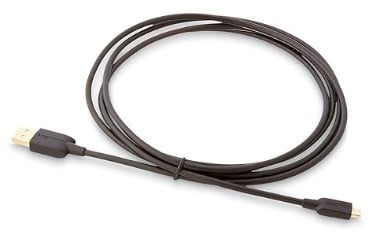
USB Data Cable
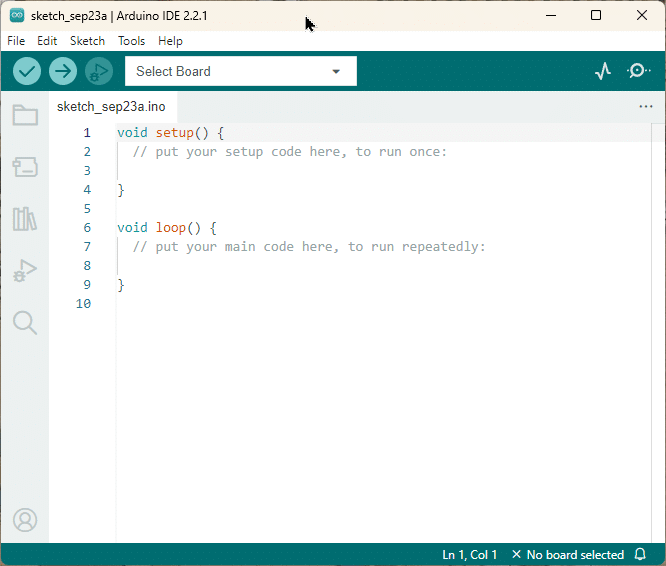
Arduino IDE
Installing the ESP32 Core
Installing the ESP32 Core is very simple. Just start your Arduino IDE and follow the steps outlined below.
Additional boards manager URLs
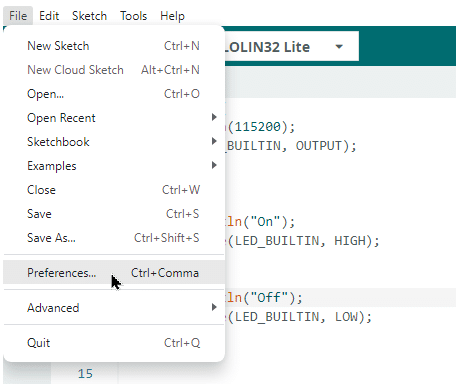
First open the Preferences dialog by selecting “Preferences…” from the “File” menu:
This will open the Preferences dialog shown below. Under the Settings tab you will find an edit box at the bottom of the dialog that is labelled “Additional boards manager URLs“:
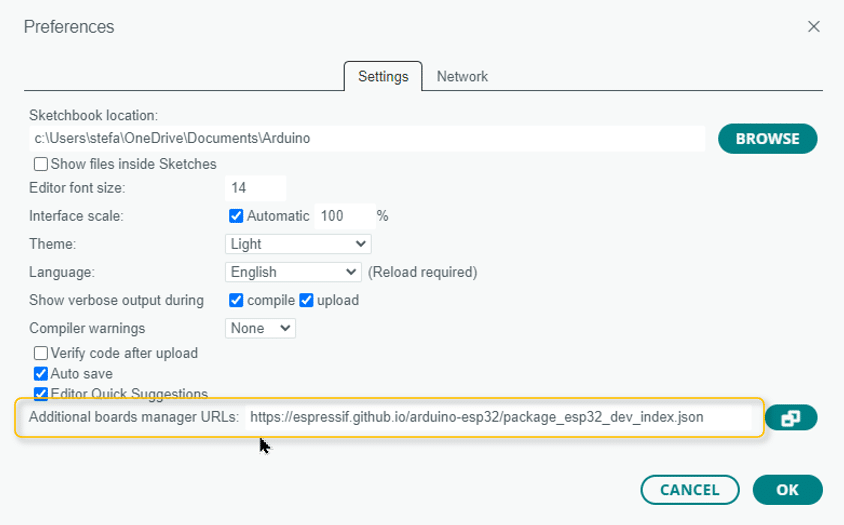
In this input field copy the following URL: “https://espressif.github.io/arduino-esp32/package_esp32_dev_index.json“
This will let the Arduino IDE know where to find the ESP32 core libraries. Next we will actually install the ESP32 core libraries using the Boards Manager.
Boards Manager
Open the Boards Manager via the Tools menu. In the screenshot below you can see that I have the “WEMOS LOLIN32 Lite” board selected. You will see a different board there but that is fine. Just select whatever board you see and click on “Boards Manager …”:

You will see the Boards Manager appearing in the left Sidebar. Enter “ESP32” in the search field at the top and you should see two types of ESP32 boards; the “Arduino ESP32 Boards” and the “esp32 by Espressif” boards. We want the esp32 libraries by Espressif. Click on the INSTALL button and wait until the download and install is complete.

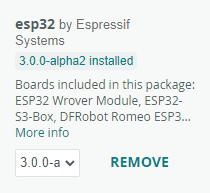
Once installed your Boards Manager should look like this, though the actual version (here 3.0.0-a) might differ.
Note that you can use the same process to install the ESP8266 alternatively or in addition to the ESP32 core. Just use the following URL: https://arduino.esp8266.com/stable/package_esp8266com_index.json.
In the next step I show you how to select the ESP32 board you want to program.
Select the Board
To select a board go the Tools menu. Click on Board: “XXX”. Again you probably will see a different board from what is shown below. That is fine. Go to the submenu and you should see the “Arduino AVR Boards” and below the “esp32” (As you can see, I have also the esp8266 boards installed). Click on “esp32” and you will get a massive list of available board.
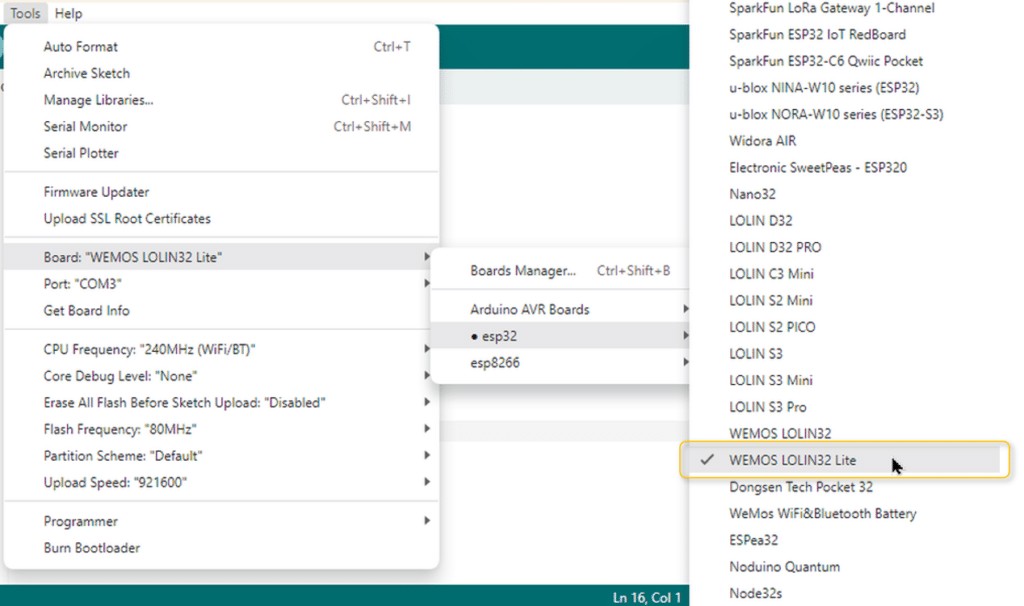
Find your board in the list. In this example I am using the WEMOS LOLIN32 Lite board and therefore select that. However, for the following programming examples almost any other ESP32 board will work. Just make sure that you select the board you actually have connected to your computer.
Blink Example
To test the correct installation of the ESP32 core libraries we will use the classic Blink example. You should be familiar with the code.
void setup() {
  Serial.begin(115200);
  pinMode(LED_BUILTIN, OUTPUT);
}

void loop() {
  Serial.println("On");
  digitalWrite(LED_BUILTIN, HIGH);
  delay(1000);

  Serial.println("Off");
  digitalWrite(LED_BUILTIN, LOW);
  delay(1000);
}
Just follow the usual steps of compiling and downloading the code via the Arduino IDE to your board.
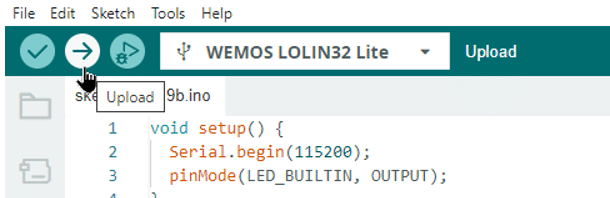
Make sure you have the correct baud rate selected in your Serial Monitor. Once the program starts running you should see the built-in LED blinking and the Serial Monitor shows a sequence of “On”, “Off” message.
If that all works, then Congratulations! You have successfully installed the ESP32 core and now can program ESP32 boards.
Board Specs Example
In this example we will program the ESP32 to tell us its specification. The following sketch will print out information such as the chip model and revision, the number of cores, the CPU frequency and more. This is useful if you have a new board.
// Based on: https://github.com/espressif/arduino-esp32/blob/master/cores/esp32/Esp.h

void setup() {
  Serial.begin(115200);
}

void loop() {
  Serial.printf("Specs -------------------------------\n");
  Serial.printf("Model              : %s\n", ESP.getChipModel());
  Serial.printf("Revision           : %d\n", ESP.getChipRevision());
  Serial.printf("Cores              : %d\n", ESP.getChipCores());
  Serial.printf("CPU Freq           : %d\n", ESP.getCpuFreqMHz());
  Serial.printf("Free Heap          : %d\n", ESP.getFreeHeap());
  Serial.printf("Flash Size         : %d\n", ESP.getFlashChipSize());
  Serial.printf("Sketch Size        : %d\n", ESP.getSketchSize());
  Serial.printf("Free Sketch Space  : %d\n", ESP.getFreeSketchSpace());
  Serial.printf("SDK Version        : %s\n", ESP.getSdkVersion());
  Serial.printf("Core Version       : %s\n", ESP.getCoreVersion());
  delay(5000);
}
If you run this code, you should see the following information for a WEMOS LOLIN32 Lite board on the Serial Monitor:
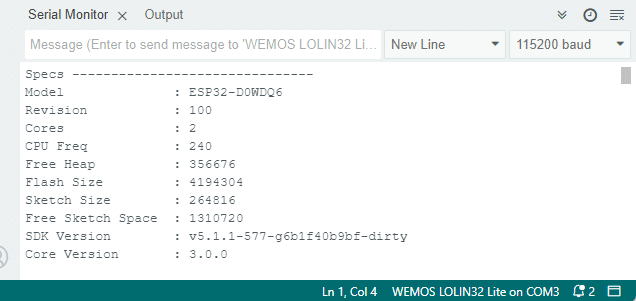
Especially useful is the information about the Sketch Size and the Free Sketch Space. It tells you how much more code you can add before running out of memory.
In the next example we will take advantage of the WIFI capabilities of ESP32 board.
WIFI Example
The following code is based on ESP32 example code you can find at https://github.com/espressif/arduino-esp32/blob/master/libraries/WiFi/examples/WiFiScan/WiFiScan.ino.
I just factored out two functions to make the code a bit more structured and readable. It is a simple WIFI scanner that reports all WIFI networks, their SSID, channel, strength and encryption type.
#include "WiFi.h"

void print_network_info(int i) {
  Serial.printf("%2d", i + 1);
  Serial.print(" | ");
  Serial.printf("%-32.32s", WiFi.SSID(i).c_str());
  Serial.print(" | ");
  Serial.printf("%4ld", WiFi.RSSI(i));
  Serial.print(" | ");
  Serial.printf("%2ld", WiFi.channel(i));
  Serial.print(" | ");
}

void print_auth_type(int i) {
  switch (WiFi.encryptionType(i)) {
    case WIFI_AUTH_OPEN:
      Serial.print("open");
      break;
    case WIFI_AUTH_WEP:
      Serial.print("WEP");
      break;
    case WIFI_AUTH_WPA_PSK:
      Serial.print("WPA");
      break;
    case WIFI_AUTH_WPA2_PSK:
      Serial.print("WPA2");
      break;
    case WIFI_AUTH_WPA_WPA2_PSK:
      Serial.print("WPA+WPA2");
      break;
    case WIFI_AUTH_WPA2_ENTERPRISE:
      Serial.print("WPA2-EAP");
      break;
    case WIFI_AUTH_WPA3_PSK:
      Serial.print("WPA3");
      break;
    case WIFI_AUTH_WPA2_WPA3_PSK:
      Serial.print("WPA2+WPA3");
      break;
    case WIFI_AUTH_WAPI_PSK:
      Serial.print("WAPI");
      break;
    default:
      Serial.print("unknown");
  }
  Serial.println();
}

void setup() {
  Serial.begin(115200);

  // Set WiFi to station mode and disconnect from an AP if it was previously connected.
  WiFi.mode(WIFI_STA);
  WiFi.disconnect();
  delay(100);
}

void loop() {
  Serial.print("Scanning ... ");
  int n = WiFi.scanNetworks();
  Serial.println("done.");
  if (n == 0) {
    Serial.println("no networks found");
  } else {
    Serial.printf("%d networks found\n", n);
    Serial.println("Nr | SSID                             | RSSI | CH | Encryption");
    for (int i = 0; i < n; ++i) {
      print_network_info(i);
      print_auth_type(i);
      delay(10);
    }
  }
  WiFi.scanDelete();
  delay(5000);
}
Here a quick explanation of the code. We start with the helper functions:
Helper Functions
The print_network_info() function is responsible for printing the information of each Wi-Fi network found during the scan. It takes an integer parameter i which represents the index of the network in the list of scanned networks.
The print_auth_type() function prints the authentication type of each Wi-Fi network found during the scan. It takes an integer parameter i which represents the index of the network in the list of scanned networks. It uses a switch statement to determine the authentication type based on the value returned by WiFi.encryptionType(i).
Setup Function
In the setup() function, we initialize the serial communication at a baud rate of 115200 and configure the ESP32 to work in station mode (WIFI_STA). We also disconnect from any previously connected access point (AP) using WiFi.disconnect().
Loop Function
In the loop() function, we start by printing “Scanning … ” to indicate that the scan is in progress. We then call WiFi.scanNetworks() to scan for available Wi-Fi networks and store the number of networks found in the variable n. We print the number of networks found and the header for the network information table.
After that, we loop through each network and call the print_network_info() and print_auth_type() functions to print the network information. We delay for 10 milliseconds between each network to avoid overwhelming the serial output. After scanning all networks, we call WiFi.scanDelete() to free the memory used by the scan results. Finally, we delay for 5 seconds before starting the next scan.
Output Example
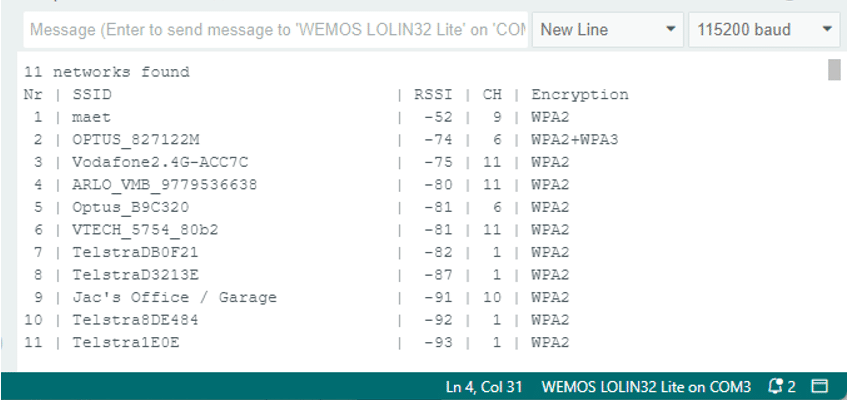
Below an example of the WIFI networks the scanner detects for me. The strongest network is typically your on WIFI network.
Since the WEMOS LOLIN32 Lite board has a LiPo Battery connector you could use this code to build your own portable WIFI network scanner. Obviously, you would have to display the scanning results on a display. Have a look at our tutorial on: How to Connect an I2C LCD with ESP32 – An Easy Guide for that.
Conclusions
Programming the ESP32 using the Arduino IDE is easy. By installing the ESP32 Arduino Core and following the step-by-step guide provided in this blog post, you can quickly get started with your ESP32 projects.
Throughout this tutorial, we covered the necessary parts required for programming the ESP32, including the ESP32 board itself and the Arduino IDE. We also discussed how to install the ESP32 Core, which is essential for enabling Arduino IDE support for the ESP32.
We then explored various code examples to demonstrate the capabilities of the ESP32. The Blink Code Example was used to confirm correct installation and function of the ESP32 core. The ESP32 Spec Example demonstrated how to retrieve and display information about the ESP32 board. Finally, the WiFi Example showcased how to connect the ESP32 to a Wi-Fi network, enabling you to leverage the ESP32’s wireless capabilities.
If you encounter any issues or have questions along the way, refer to the Frequently Asked Questions section for additional guidance. Additionally, the provided links will direct you to further resources, including official documentation, forums, and community support.
And now, have fun with your ESP32 ; )
Frequently Asked Questions
Here are some frequently asked questions about programming the ESP32 with the Arduino IDE:
Q: Can I use the Arduino IDE to program the ESP32?
A: Yes, the Arduino IDE is a popular and user-friendly development environment that supports programming the ESP32. It provides a familiar interface and a wide range of libraries and examples to get started with.
Q: How do I install the ESP32 Core in the Arduino IDE?
A: To install the ESP32 Core in the Arduino IDE, you can follow these steps:
1. Open the Arduino IDE. 2. Go to “File” > “Preferences”.
3. In the “Additional Boards Manager URLs” field, enter the following URL: https://dl.espressif.com/dl/package_esp32_index.json
4. Click “OK” to save the preferences.
5. Go to “Tools” > “Board” > “Boards Manager”.
6. In the Boards Manager, search for “esp32”.
7. Click on the “esp32” entry and click the “Install” button.
8. Wait for the installation to complete.
9. Once installed, you can select the ESP32 board from the “Tools” > “Board” menu.
Q: What are the required parts to program the ESP32?
A: To program the ESP32, you will need the following parts:
– An ESP32 development board
– A USB cable for connecting the board to your computer
– A computer with the Arduino IDE installed
Q: Can I use the same Arduino code for the ESP32?
A: In most cases, you can use the same Arduino code for the ESP32 with minor modifications. The ESP32 has a similar architecture to the Arduino boards and is compatible with many Arduino libraries. However, there may be some differences in pin assignments and library support, so it’s recommended to refer to the ESP32 documentation and examples for specific details.
Q: How can I connect the ESP32 to Wi-Fi?
A: The ESP32 has built-in Wi-Fi capabilities, and you can easily connect it to a Wi-Fi network using the Arduino IDE. There are several examples available that demonstrate how to connect the ESP32 to Wi-Fi and perform tasks such as sending HTTP requests or creating a web server. You can find these examples in the Arduino IDE under “File” > “Examples” > “WiFi”.
Q: Are there any limitations when programming the ESP32 with the Arduino IDE?
A: While the Arduino IDE provides a convenient way to program the ESP32, there are a few limitations and challenges to be aware of. The ESP32 has more advanced features and capabilities compared to traditional Arduino boards, so some advanced functionalities may require additional configuration or custom libraries.
Links

I am Puneeth. I love tinkering with open-source projects, Arduino, ESP32, Pi and more. I have worked with many different Arduino boards and currently I am exploring, Arduino powered LoRa, Power line communication and IoT.